Tuesday, September 19, 2006

The Donor Bike

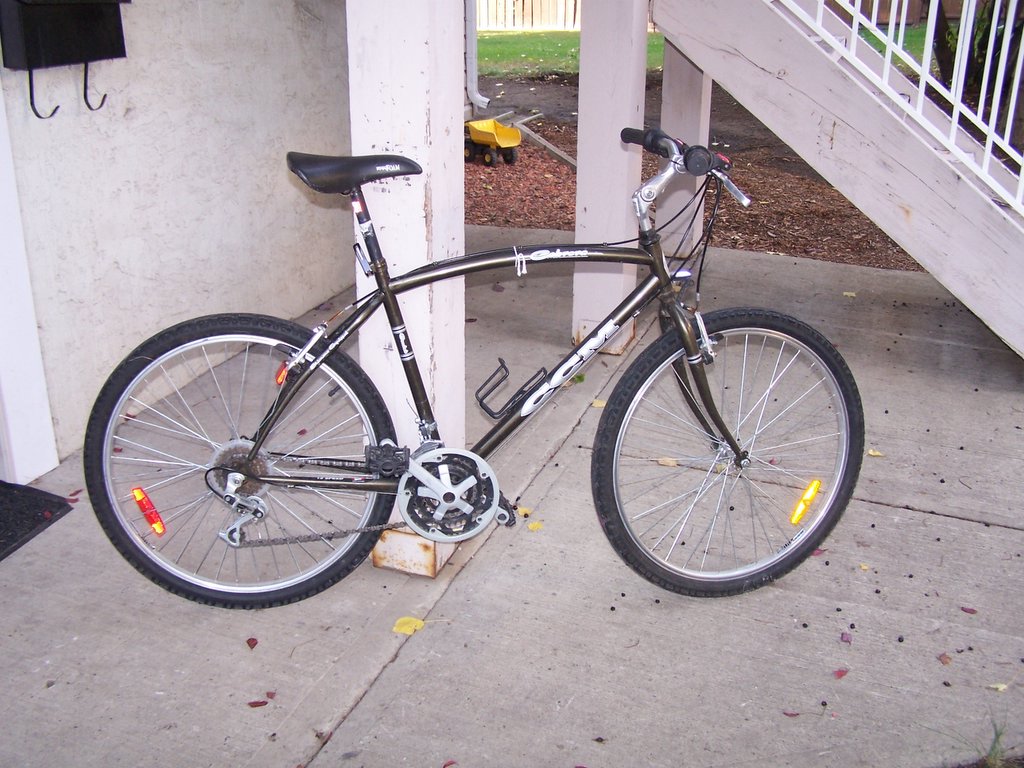
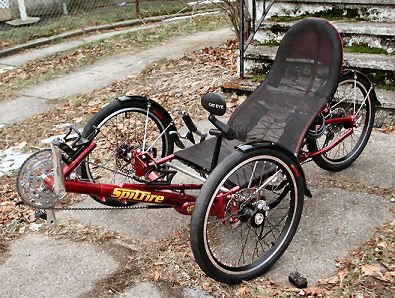
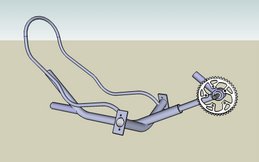
Here is the donor bike I bought for the Road Rooster project. I got it for $20 at the police auction in Winnipeg (but with no seat). I need the rear wheel, crank assembly, both brakes, derailers and grip shifters as well as cutting off the rear triangle. I like the tires it has too!
But here is a problem. I took it for a couple rides and I think I like it better than my good 2 wheel bike... but I am not about to cut up my good bike for the Road Rooster... decisions, desisions...


Total cost: $20.00
Total project parts cost to date: $131.10
Total project cost to date: $138.29
Project budget: $200
Remaining budget: $61.71

Wire Feed Welder

I love Princess Auto. I went there to look at their wire feed welders and sure enough they were on sale for a ridiculously low price. Also bought a welding helmet and gloves. Where else can you buy a welding helmet for $7? Posted by Picasa

Wednesday, March 15, 2006

I got pipe!


Yesterday I got the tubing made for the main frame of the "Road Ruzter" (as Bruce calls it). I was a little nervous because the main tube has 2 bends that must be made on exactly the same plane. The guys at Midas did a great job, the bends are bang on! 3 of the tubes are 2" exhaust tubing and the 4th is 1 7/8" so that it slides inside the 2". This allows the pedals to be adjustable for the rider's height. I chose exhaust tubing instead of aluminum because I don't have any way to weld aluminum myself, even though it is much lighter.

The 2nd picture is the mock up with the seat frame.

Total cost: $49.02
Total project parts cost to date: $111.10
Total project cost to date: $118.29
Project budget: $200
Remaining budget: $81.71 Posted by Picasa

Saturday, February 25, 2006

Seat Frame

This is the assembled seat frame. It is comprised of 3 pieces of 1" aluminum, the 2 sides and the top hoop.

Total cost: $18.47 CAD
Total project parts cost to date: $62.08
Total project cost to date: $69.27
Project budget: $200
Remaining budget: $130.73

Tube bending jig

These are the 2 tube bending jigs I built to bend the seat frame. The tubes are shown after they were trimmed for length. I had to heat the tubing to get it to bend properly because of the "spring back" when bending. Posted by Picasa

Tuesday, February 14, 2006

Success!


I cut a new bending surface, this time with a 5.5 inch radius instead of the previous 3.5. As you can see no kinking and I didn't even use a groove! I may have to adjust the seat design slightly to accomodate the larger radius bends.

Failure!


Sadly, both the plain curve and the grooved curve both kinked the tubing. I suspect it has to do with the tight 3 inch radius I am trying to bend!

Making the bending jig


Here are some quick pics of me making the jigs for bending the seat frame. These will get screwed to the plywood layout I showed in an earlier post. The last photo shows routering a groove, I only did one this way, I will try it both ways to see if the groove is necessary to stop the tube from kinking.

Tuesday, February 07, 2006

More Rod Ends!

My eBay purchase of 8-1/4" rod ends arrived today. They will be used in the steering linkage for the trike. I love eBay, this project would definitely be done differently otherwise as parts like this bought locally would blow the budget :)

Total cost: $13.48 CAD
Cost if bought locally: $89.99
Total project parts cost to date: $43.61
Total tool cost to date: $7.19
Total project cost to date: $50.80
Project budget: $200

Remaining budget: $149.20

Laying out the seat bending jig


Today, Jack and I drew out the seat profile on a piece of plywood. This will later help align the bending jigs. I was surprized, the seat is smaller than I thought it would be, just like the frame. I have heard before that you can't lay out angles accurately with a protracter, but now I believe it. I would first measure the angle with the protractor, then have to adjust it after I measured it with a ruler. To measure an angle with a ruler I used:

Saturday, February 04, 2006

Tools!

I received my router bit I bought on eBay today. "What does that have to do with trike building?" you may ask. To fabricate the seat frame I have to do some somewhat complex bending of 1" aluminum tubing (LINK). I could buy a conduit bender but as Grant points out, I am too cheap ;) A bender (LINK) costs at least $33.00 and I would probably need 2 of them. I can make my own bender like this LINK or an alternate method is to build a bending jig out of wood. Here is a LINK to an example. I am probably going to build a jig but add the curved trough that the bender has to lower the possiblity of kinking the tubing. THAT is where the router bit comes in. I will assemble the jig, then cut a groove for the tube to sit in as it is being bent. Clear as mud??? I will post some pics when I start bending some tube.

Cost = $2.10 for the bit, $5.09 for shipping from the UK for a total of $7.19 CAD ($45 at Lee Valley). Total project cost to date $37.32

Saturday, January 28, 2006

Steering Knuckle Mock-up


This is a mockup I did today of the steering knuckle. The real knuckle will be built out of welded flat steel but this aproximated the shape nicely, plus I got to play with the rod ends I got on eBay!

My 1st Purchase for the Trike Project

I guess I am actually committing a little bit to this project. I bought 4-3/8" rod ends on eBay, they will end up being the "ball joints" of the steering system.

Total cost = $30.13 CAD
Cost if bought locally: $63.79
Total project cost to date: $30.13
Project budget: $200
Remaining budget: $169.87

Sunday, January 22, 2006

The Red Greene Recumbent

I decided to do a crude mock up of the trike to get an idea of the size and where things would end up. The front has 20" wheels I "borrowed" from Jack's bike trailer, they are exactly the size and type of wheel I need. The read wheel is a 26" but the real tike would probably use a 24" wheel. Yes, I know the seat is too high ;) and yes, that is a crutch used as the rear fork.

Saturday, January 21, 2006

Frame Design

This is the frame design I am going to use with some modifications. It is a Spitfire which is a later version of the Thunderbird, both designed by Rickey Horwitz. Rickey makes his frames from 6061-T6 aluminum, but I will build mine out of a combination of mild steel and aluminum. The all aluminum bike weights only 28-32 pounds (bare frame is 18 lbs)!!! Mine will be heavier, most home builds are around 50-60 lbs. I decided to draw on other people's experience and not re-invent the wheel for a change. I think there is a pun in there somewhere... Check out the Links section of this blog to see more detail about this and other designs.

P.S. This model of trike sells for $3500 US! Most trikes are at least $2500.

Friday, January 20, 2006

Welcome to the Ruzter Trike BLOG


For the past month, I have been enthralled with the idea of building a recumbent bike, specifically a recumbent trike in the tadpole (2 wheels in the front) configuration. My great friend Grant and I have spent many a late evening discussing all aspects of trikes related to building design and astetics. It has been GREAT fun.

Then I stumbled across a series of websites with tadpole design information from Rickey Horwitz. These are, by far, the most compehensive sources of info I have found so far. The more I read the more I thought I could build one myself and the more I knew how I would build it. This week I made several small purchases of parts and tools that I would need to build the trike, so I guess I am actually going to try. I am starting this blog to document what I am doing, show off my sucesses, make fun of my failures, but most of all just share with my friends and family. Wish me luck, I don't always have the best track record finishing these things, but finish or not my goal is to have fun and enjoy every single minute I am doing or thinking about this project.

It's not what you can buy, it's what you can build.

BLOG on...

Thursday, January 19, 2006